
Introduction
This article is about my herbal first aid bag. I am writing about it for two main reasons: First, with the accompanying photos and information I hope to persuade someone to make me a new version of this bag. And secondly, I hope this information is helpful for others who would like to make their own herbal first aid bags.
Backstory
Over the past 20 years, I have had two specially made first aid bags designed for my needs as a ‘first aid herbalist’. It became readily apparent as I started working in first aid that none of the off-the-shelf or specialty bags would work for me. The main reason is that there was no place to store the bottles that held tinctures, glycerites and other liquid medicines. I wanted them to be easily accessed with their labels evident.
Around this time I had an herb booth at music festivals and came across Lisa from Blue Planet Packs who made various types of high quality bags; backpacks, shoulder bags, etc. I asked her if she would work with me on designing one for herbalists.
The Original Herbal First Aid Bag
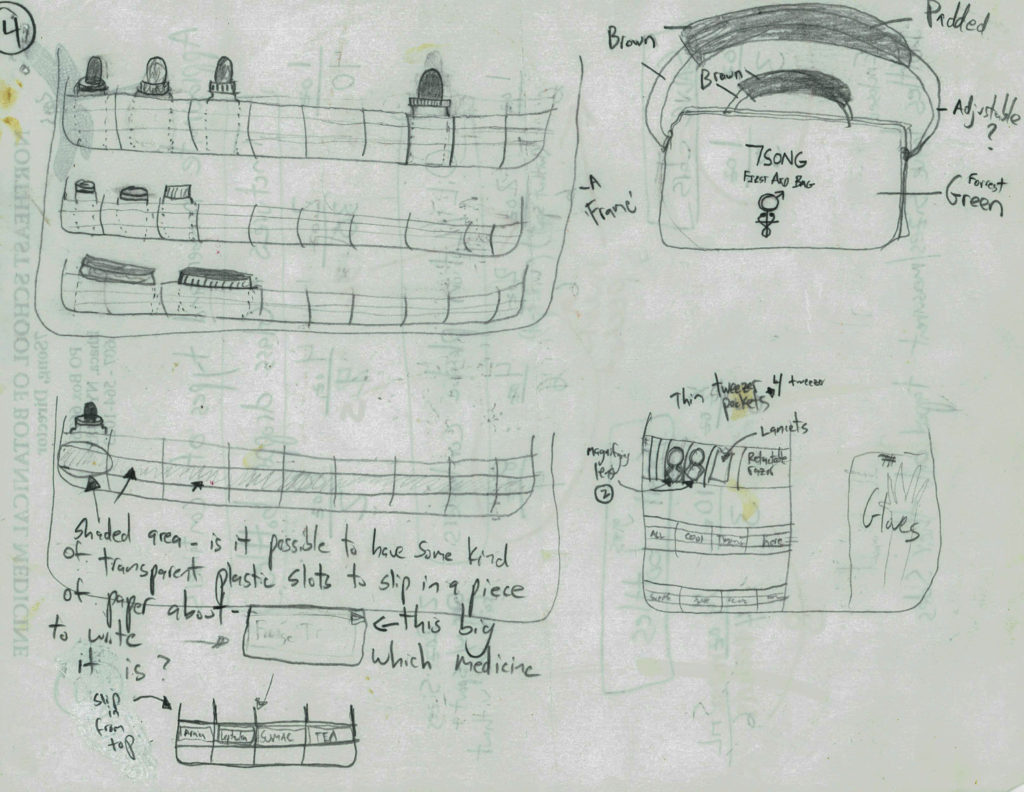
I began working with Lisa in November 1997. Here is a photo of one of the first sketches I sent her (drawing has never been one of my strong suits). The major innovation was transparent plastic over the small sleeves that hold the bottles. This allowed me to find the individual remedies expediently. (The difficulty with this design is that there is little flexibility for changes of bottle size. This and other difficulties are discussed below). This first bag was useful and held many individual bottles, but it was not easy to wear as a backpack. Also, more individual pockets were needed in the bag to hold individual supplies.
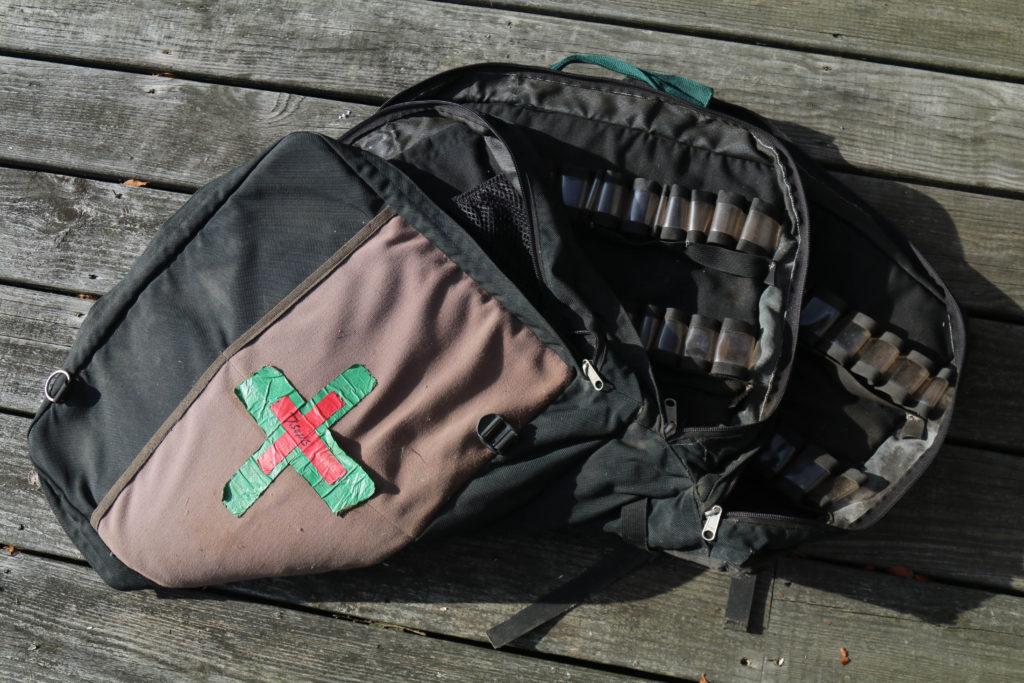
Herbal First Aid Bag #2
A few years later I talked with Lisa about designing a new bag that would be easier to carry, more backpack-like. The shape and size were changed as well as the sizes of some of the bottle holders and pockets. This is one that I have been using continuously since around 2001. I have had it modified a few times; zippers tightened, straps put on to hold bottles in place, compression straps and some parts of the pack fortified. The details are described below and are given so folks can use this as a template to make their own first aid bags. Or for anyone daring enough to help me with Herbal First Aid Bag #3
Material and Size
- The main part of the bag is made from ripstop fabric. It has done very well despite being used extensively over the years.
- The dimensions are approximately 24”L x 15”W x 5 ¾” D (depending on how full it is).
- It is made up three sleeves, individual compartments with padding in between.
Considerations
- The rip stop material worked well and it might be a good choice for the inside pockets as well so they are lighter, though this will decrease their padding.
- Three sleeves worked well, this seems like the right number for convenience and bulk.
- The whole bag needs to be rugged and waterproof. All outside parts of the bag are placed on dirt, gravel, hot pavement, etc, and need to be able to take this kind of beating.
- It is often in the heat, is there any way to keep it cooler inside?
- Rain proof
- Protection of bottles between the different sleeves
- Wash-ability
- The bag gets very dirty both inside and out.
- The fabric has to be able to withstand a good soap and water cleaning.
- Can it be washing machine safe?
- Color-definitely not camouflage-black or green work well.
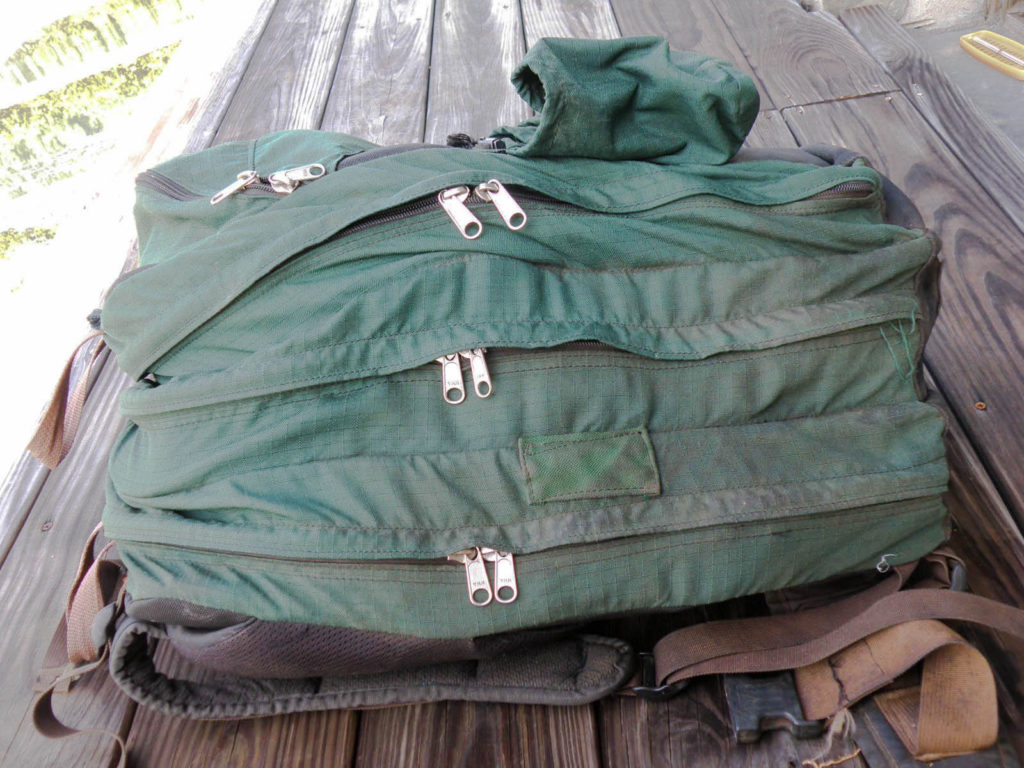
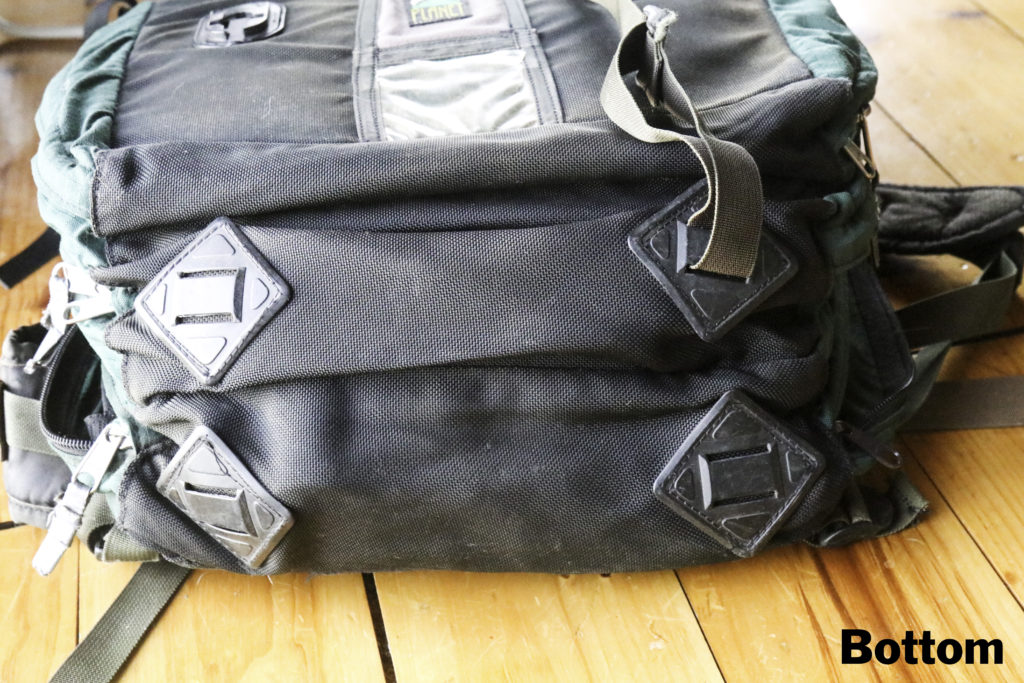
Front, Top, Back, Sides, Bottom
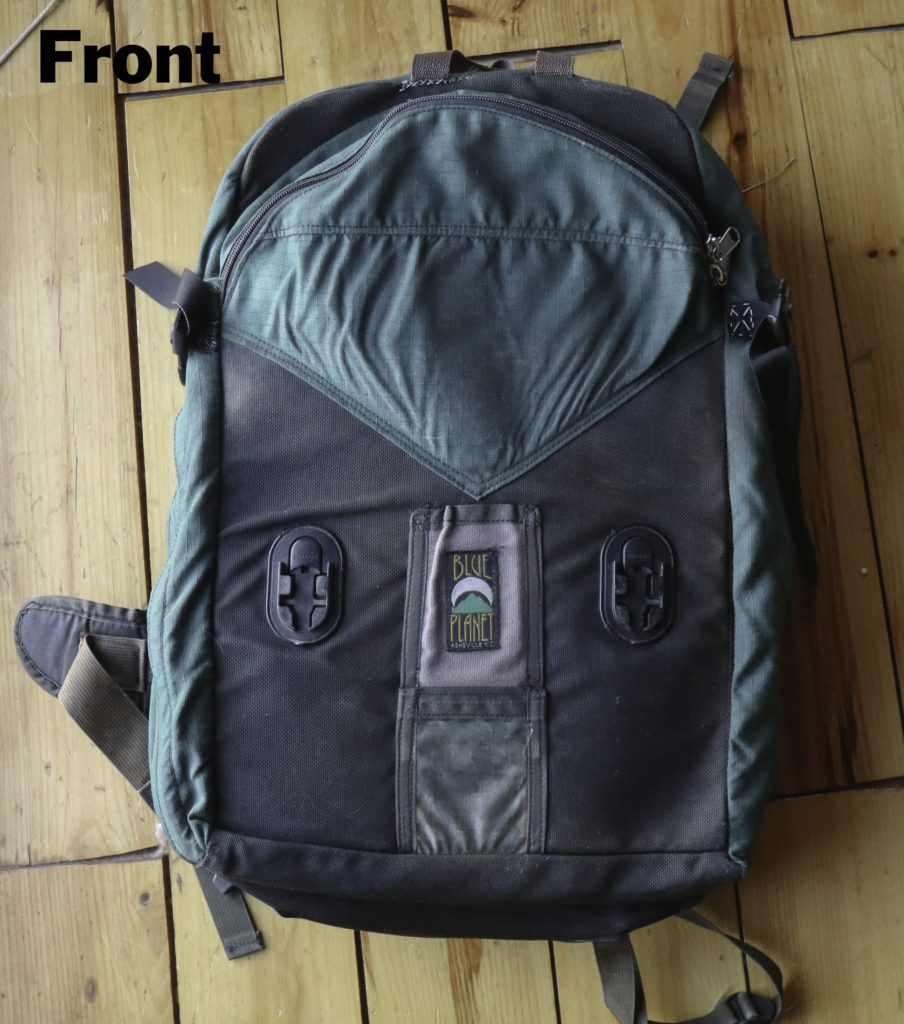
Front
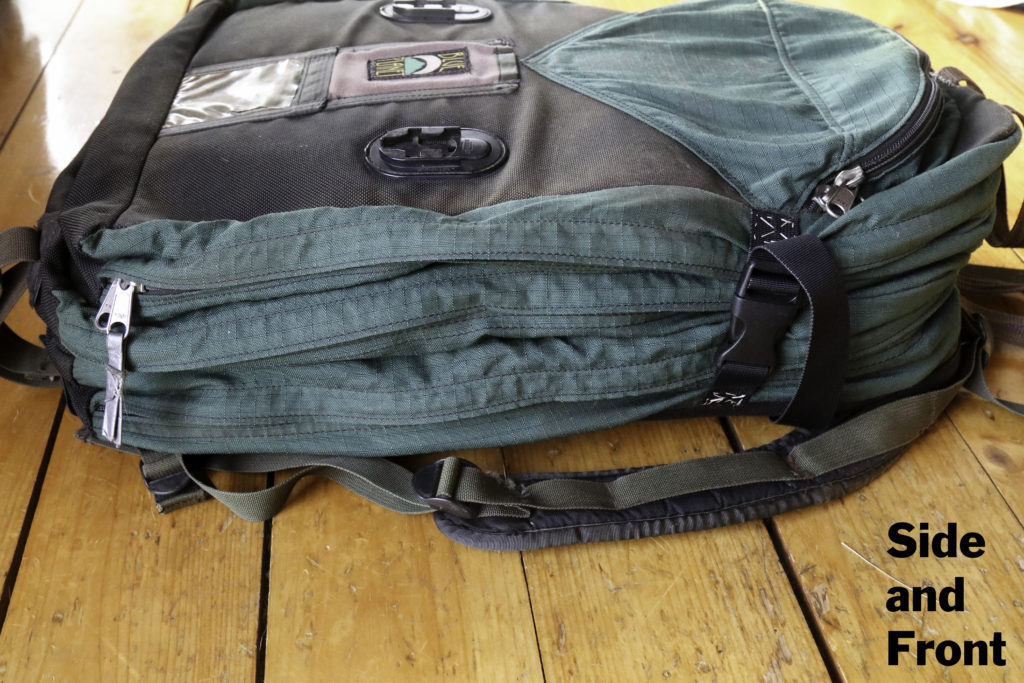
- The front panel works pretty well.
- It is important to not have much weight here, as it will cause the bag to sag and pull on the shoulders.
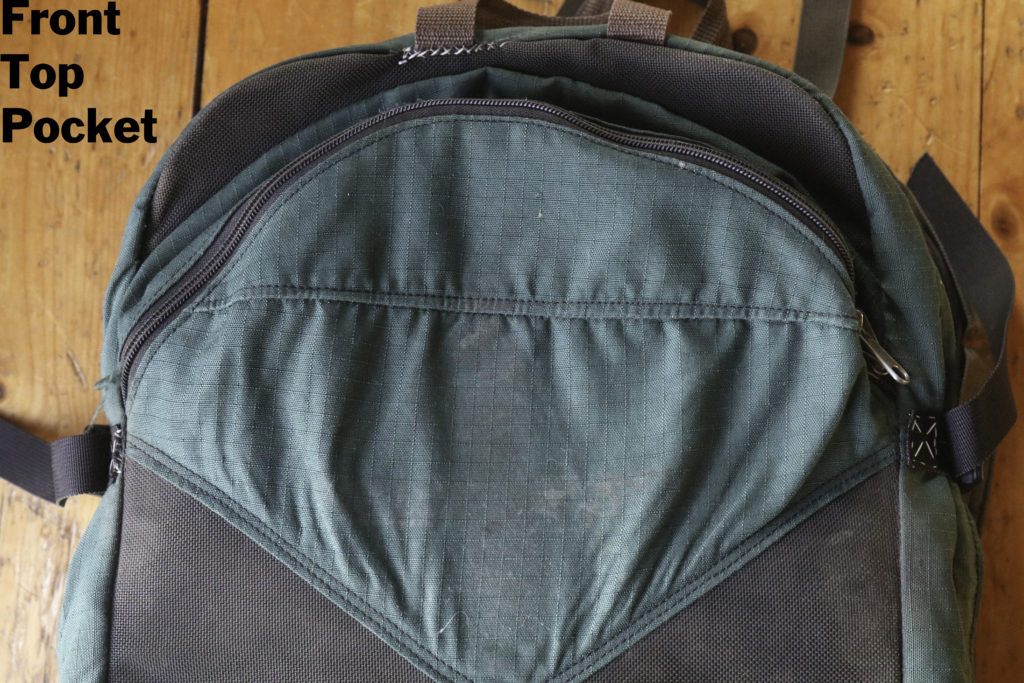
- The top pocket works well. Perhaps it could be divided inside with another zippered pocket for small items. Or two separate zippered pockets.
Considerations
- Ability to put on and remove a red cross on the front panel
- A clear sleeve to put an identification card in
- Note the 2 black plastic pieces on the front. They were for two fitted bags that held water bottles. It did not work because they added too much weight and dragged the bag downward in an uncomfortable way.
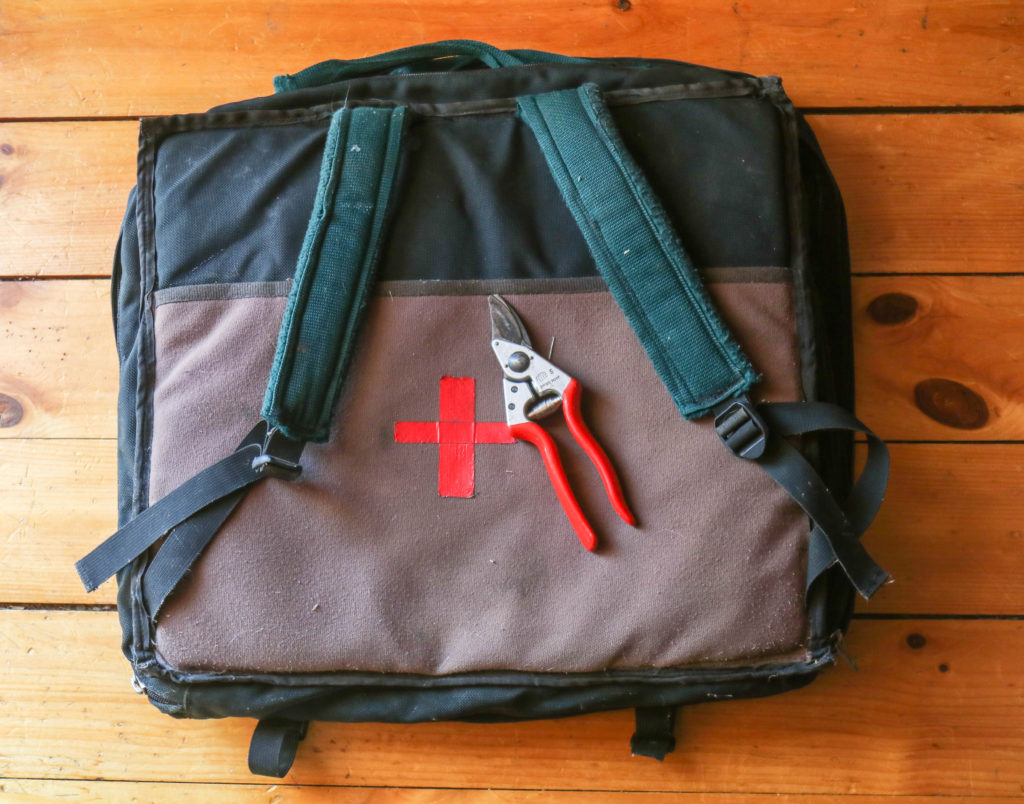
Top
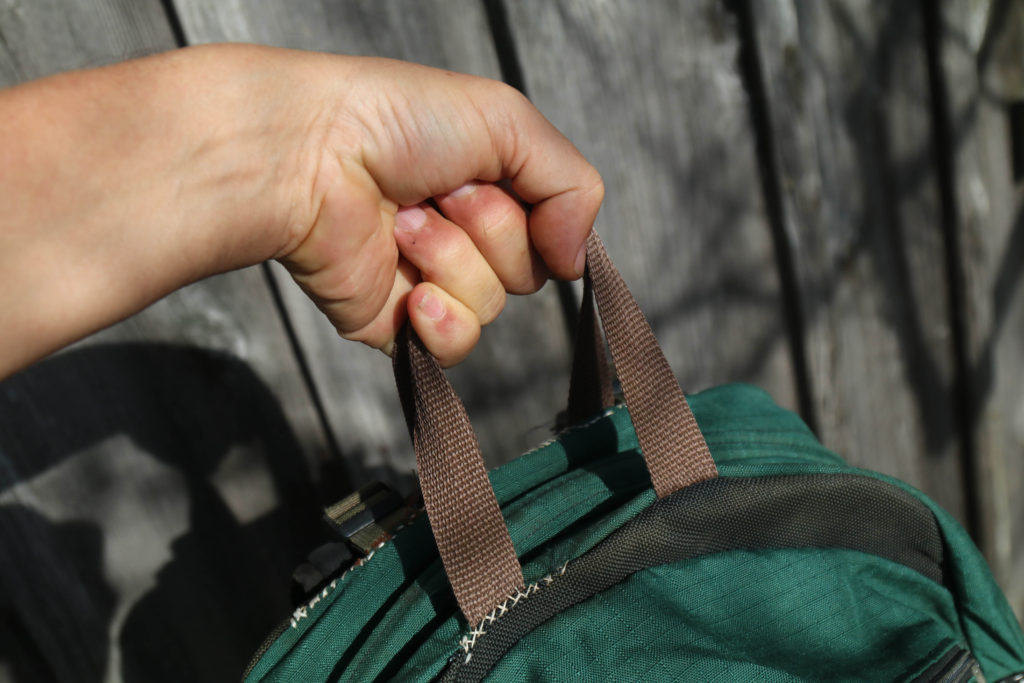
- The 2 handles are very helpful and used frequently.
Considerations
- These handles should be placed in a way to distribute the weight of the bag evenly when picked up.
- They need to be stitched well and durable to not rip under the weight.
- They could be a little more comfortable with padding, but not too bulky.
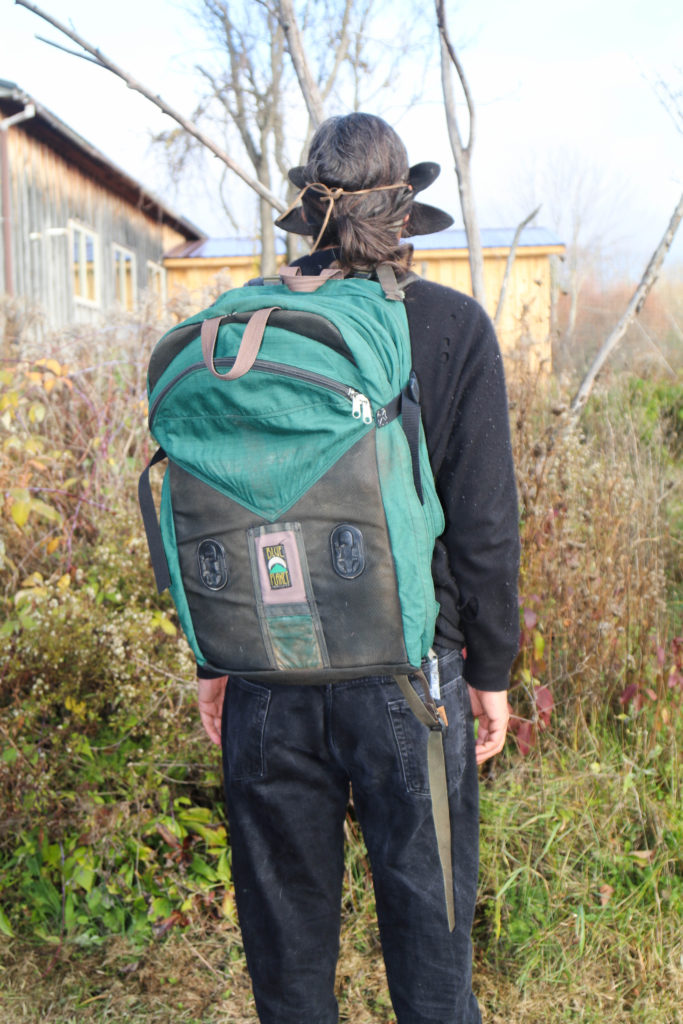
Back
- Most of the straps and pads worked well.
- It is reasonably comfortable to wear with its padded back and shoulder straps
Considerations
- The waist belt could be a bit more comfortable, but without adding too much bulk.
- Comfortability matters as the bag may be put on and taken off many times over a short period of time.

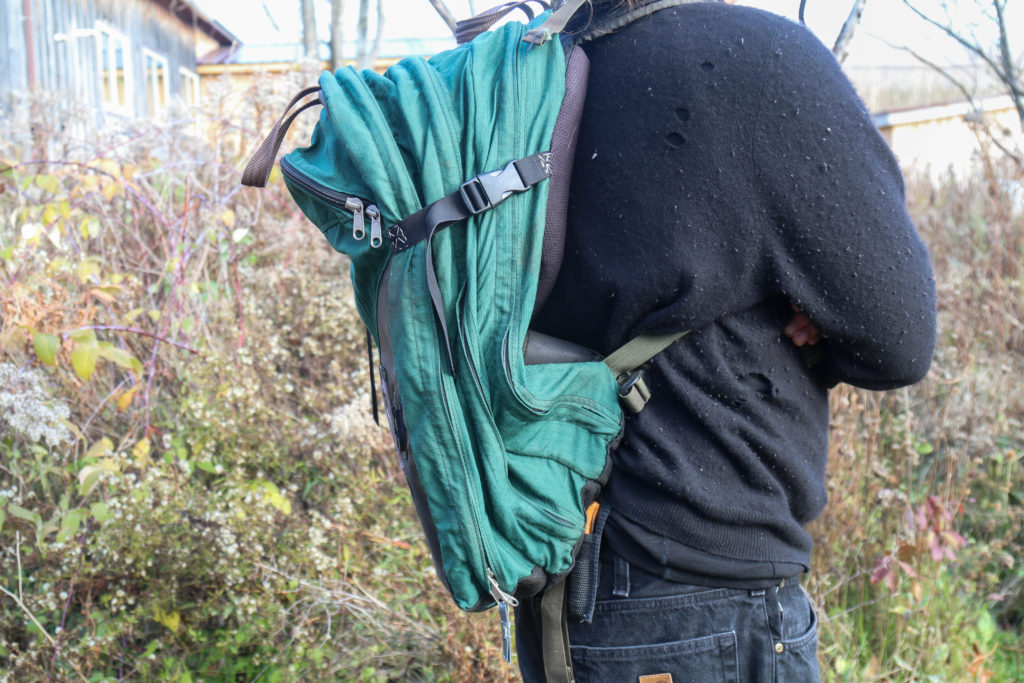
Sides
- Initially there were no compression straps, which were added later. These made it more comfortable while walking around as well as putting it in luggage while traveling by plane.
Considerations
- The compression straps should be added in the beginning so the bag can be cinched up.
- Two compression straps on each side would work well.
x
Bottom
- The bottom needs to be rugged.
- There is a place for straps to be attached on the bottom to carry a rolled-up pad or blanket. I haven’t used it, but it is a good idea.
Panel by Panel
This next section goes through the first aid bag panel by panel. These areas need the most re-designing, especially the bottle holders. There are some notes with each panel with more specific ideas for changes below.
Considerations
- It might be advantageous to have bottle holders on both sides of the same sleeve (for instance, bottle holders on panel 5 & 6 on sleeve 3).
- This would make getting a number of tinctures at the same time easier.
- But the padding from the way it currently is with pockets on one side creates some cushioning. There might be bottle against bottle damage if they are against each other.
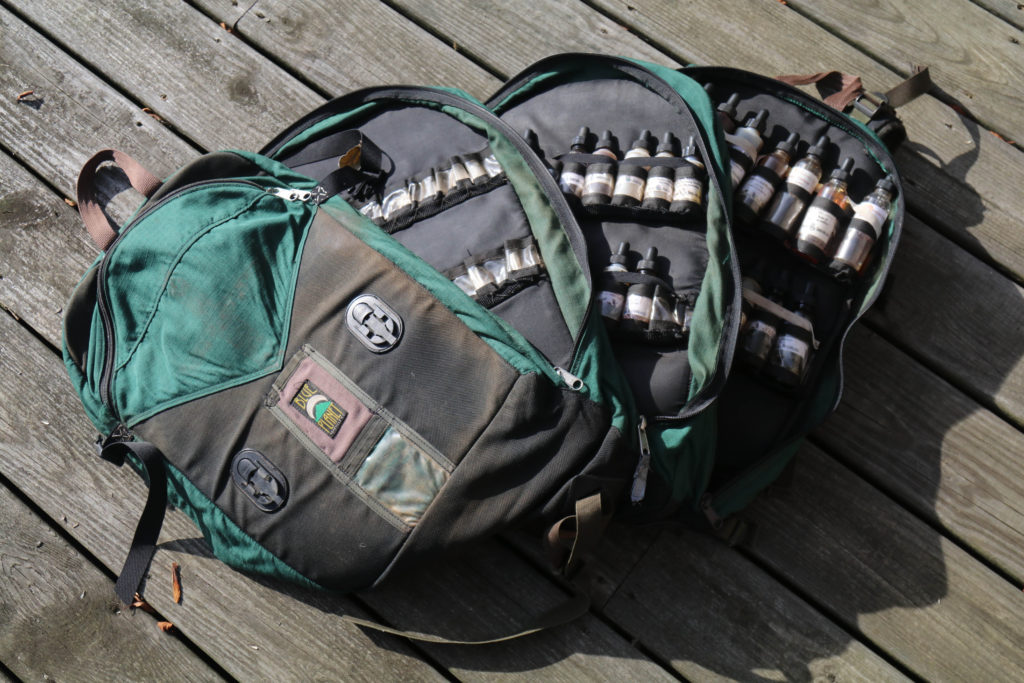
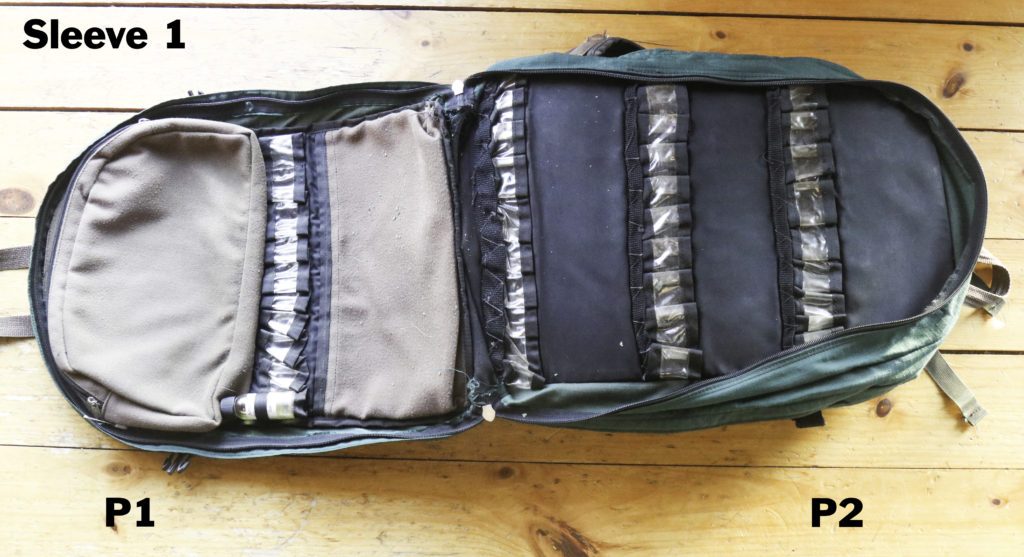
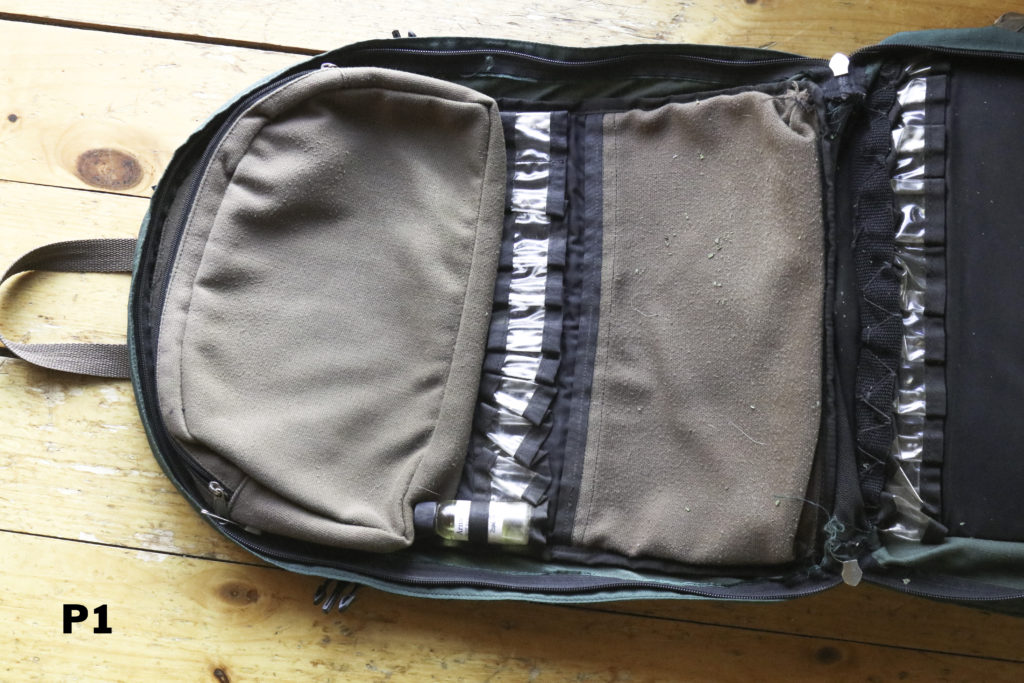
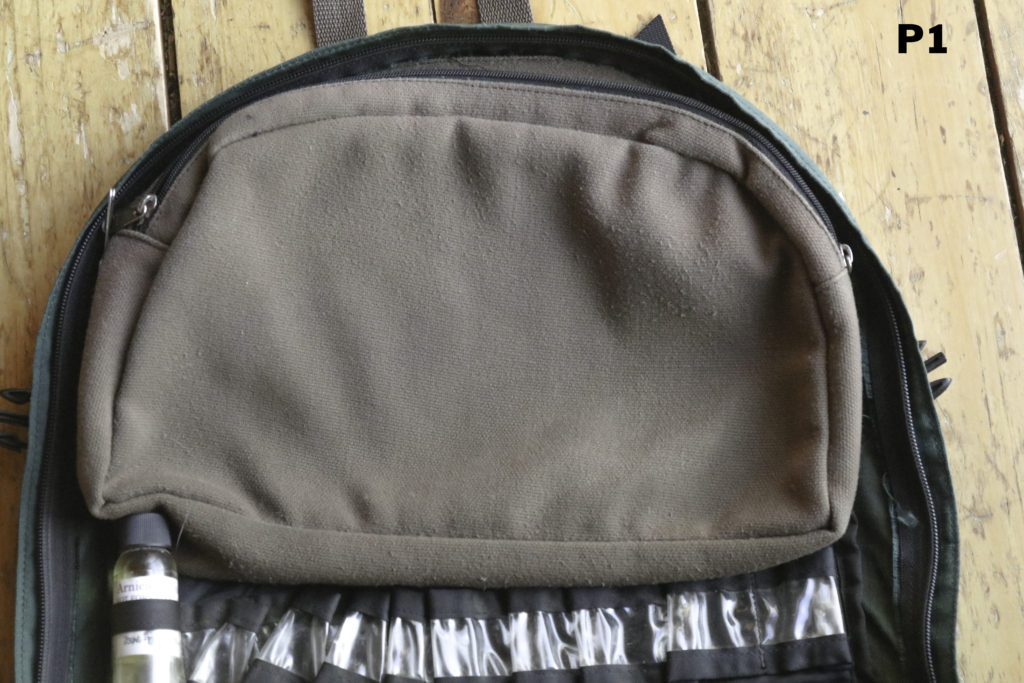
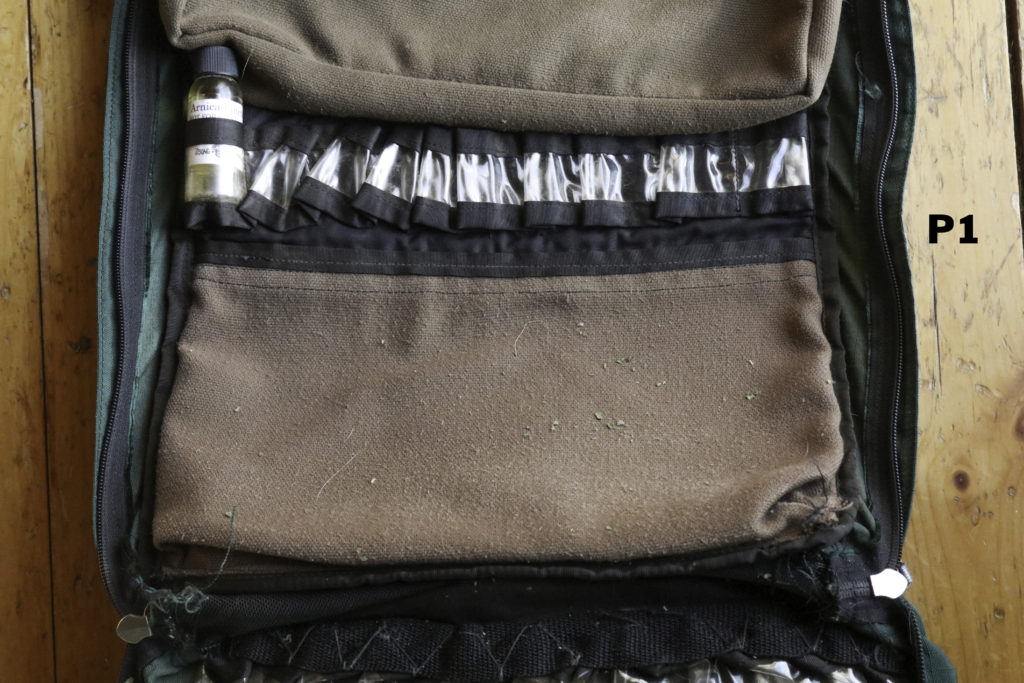
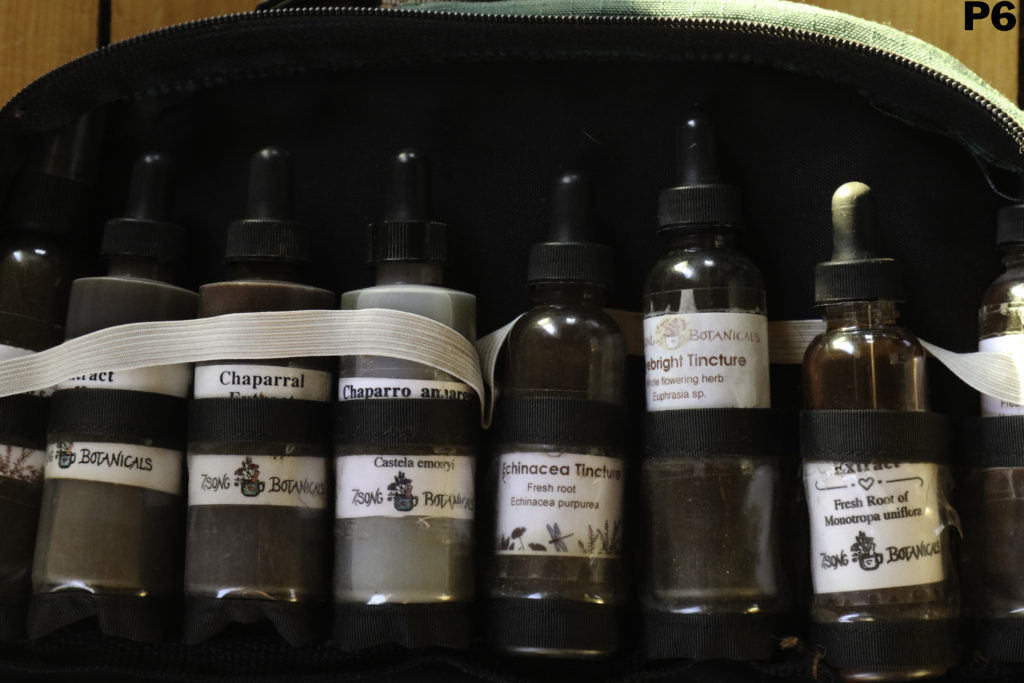
Sleeve 1 (furthest from back)-Panels 1 & 2
Panel 1
- These pockets mostly worked well. The material provided padding for smaller bottles.
- I would not have the bottle holders in between the pockets.
Considerations
- The pocket material could be a little less bulky.
- The bottom pocket (and all pockets) need closures like zippers.
- There could also be 2-4 pockets.
- It is the furthest panel from the body and should not contain heavy items.
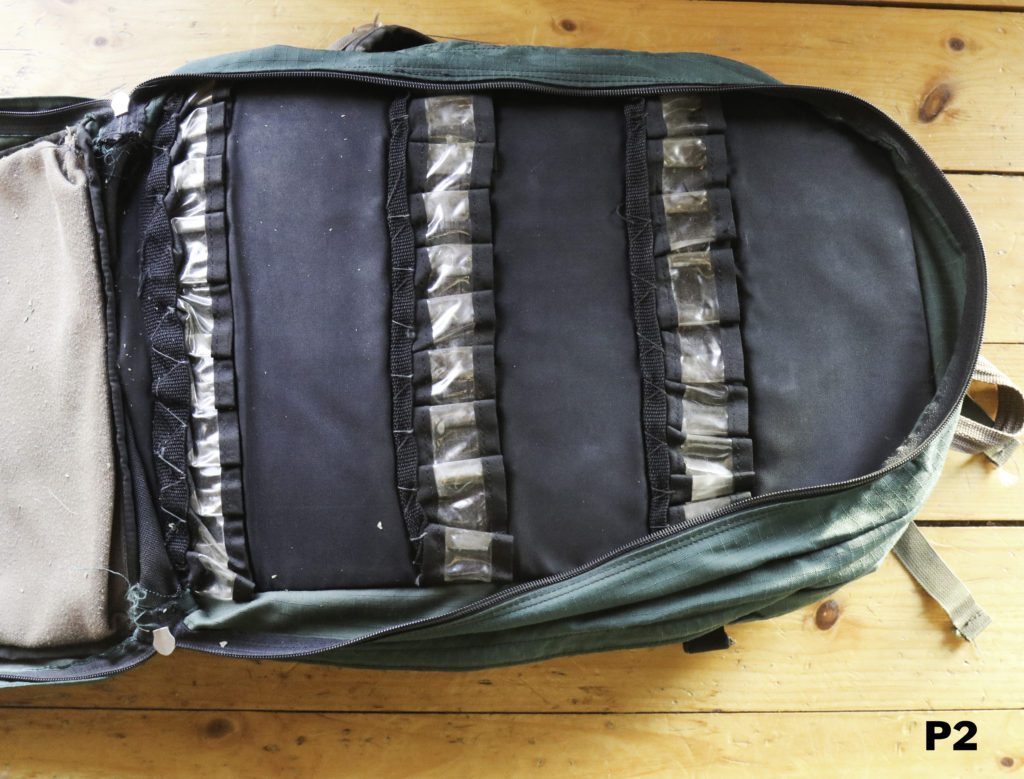
Panel 2
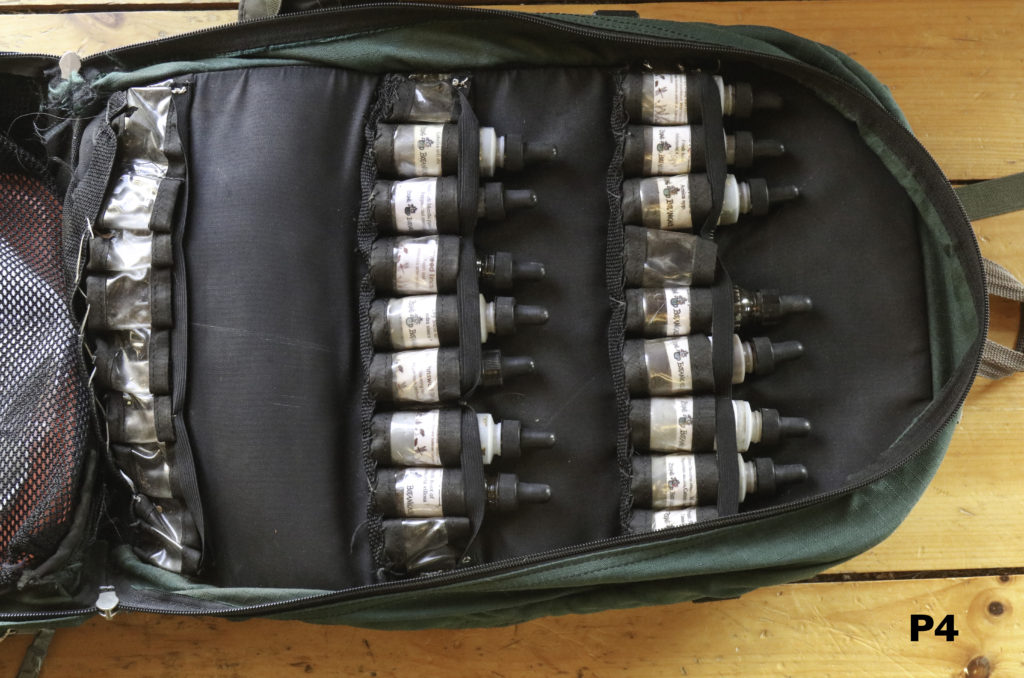
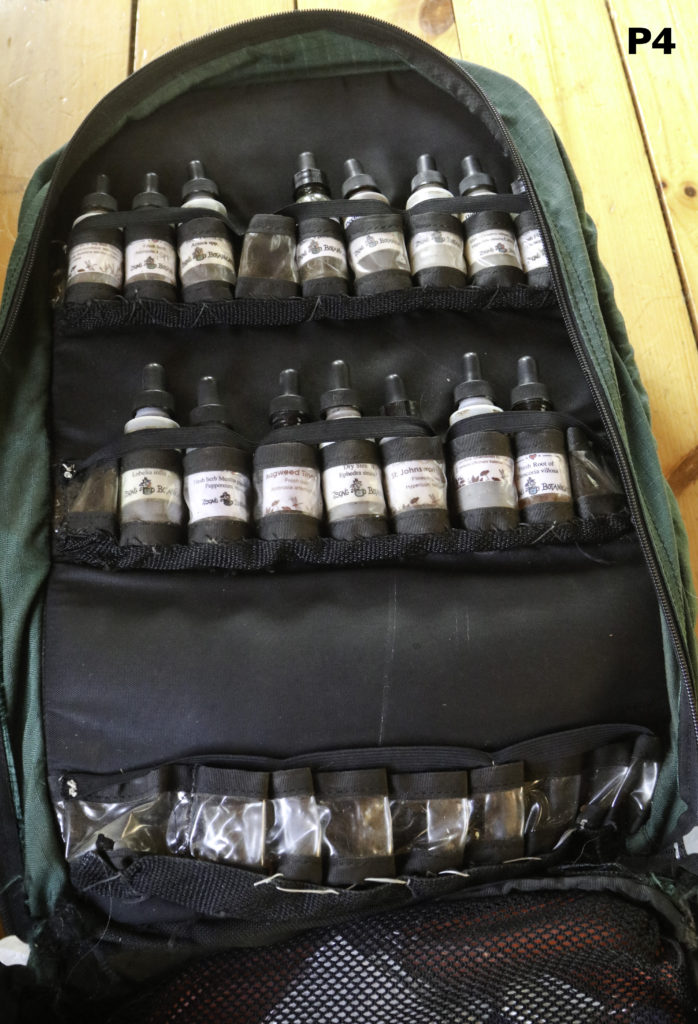
- Designed to hold many 1 oz bottles.
Considerations
- This could be made into pockets to hold supplies and equipment.
- If kept as bottle holders, they should be larger sizes, just a few devoted to 1 oz bottles.
- See ‘Bottle Holder’ notes below
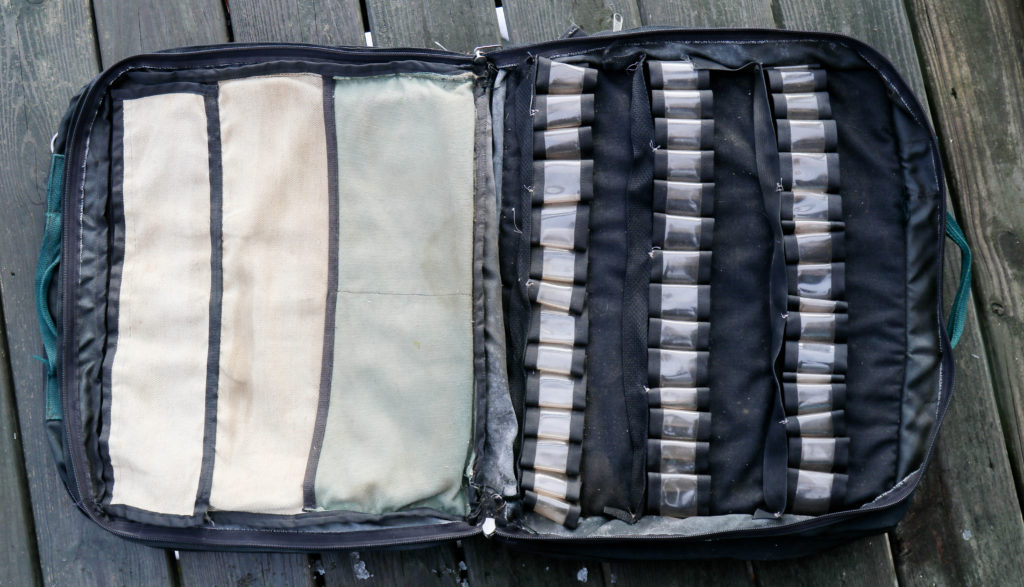
Sleeve 2 (middle)-Panels 3 & 4
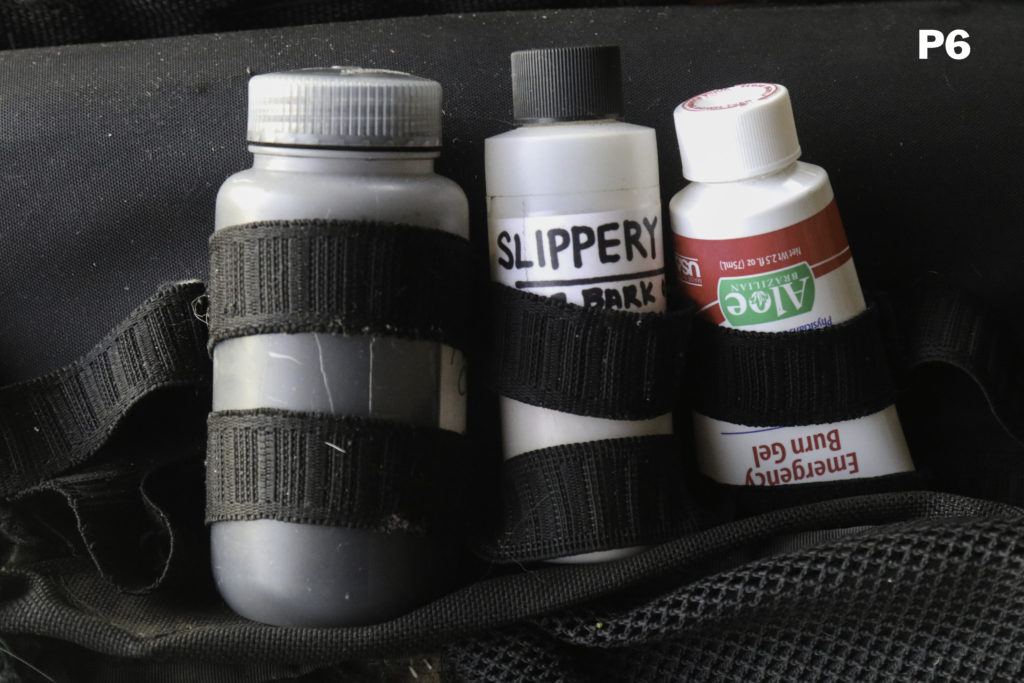
Panel 3
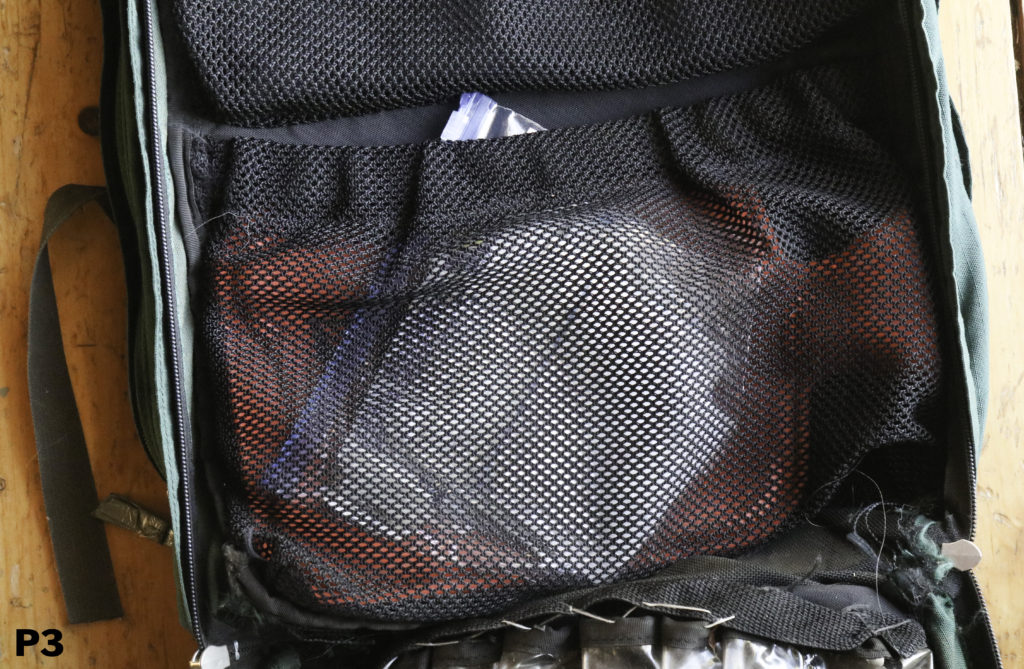
- These mesh pockets work well to see what is inside, and they expand usefully.
- The Velcro didn’t work for long and supplies flew out when the bag is opened fast (which is often), they need zippers or some type of closure.
Considerations
- Perhaps have both sides filled with bottles as long as it does not damage them. If so, move the pockets to a different sleeve
- Zippers or other fixtures for closing the mesh pockets.
Panel 4
- This panel holds 1 oz tincture bottle.
- See ‘Bottle Holder’ notes below

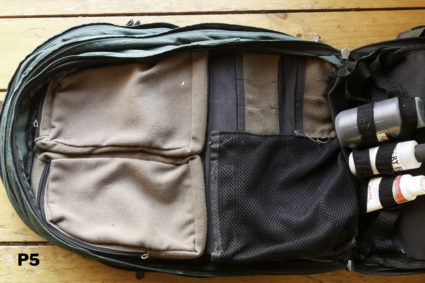
Sleeve 3 (closest to back)-Panels 5 & 6
- This sleeve should hold the heaviest items being closest to the back of the person wearing it.
- All the pockets need some kind of zipper or fixture to keep them closed, but easily opened.
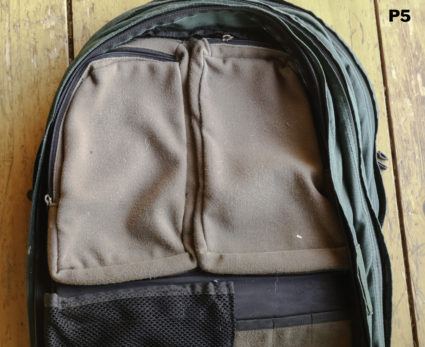
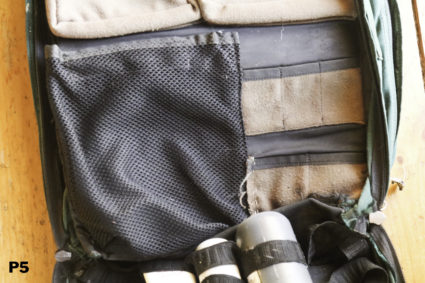
Panel 5
- The upper large pockets worked well
- The mesh pocket is useful, though needs a closure
- The small pockets were made to hold readily accessible tools such as tweezers, scissors and other similar items, but they fall out easily.
Considerations
- The large pockets are a bit bulky, but may be helpful for padding
- The small item holders need to be redesigned.
- They could have some kind of strap holding them in place
- They could be within another pocket that holds them in place, possibly zipped along 3 sides.
- These pockets would be helpful to retrieve small items readily.
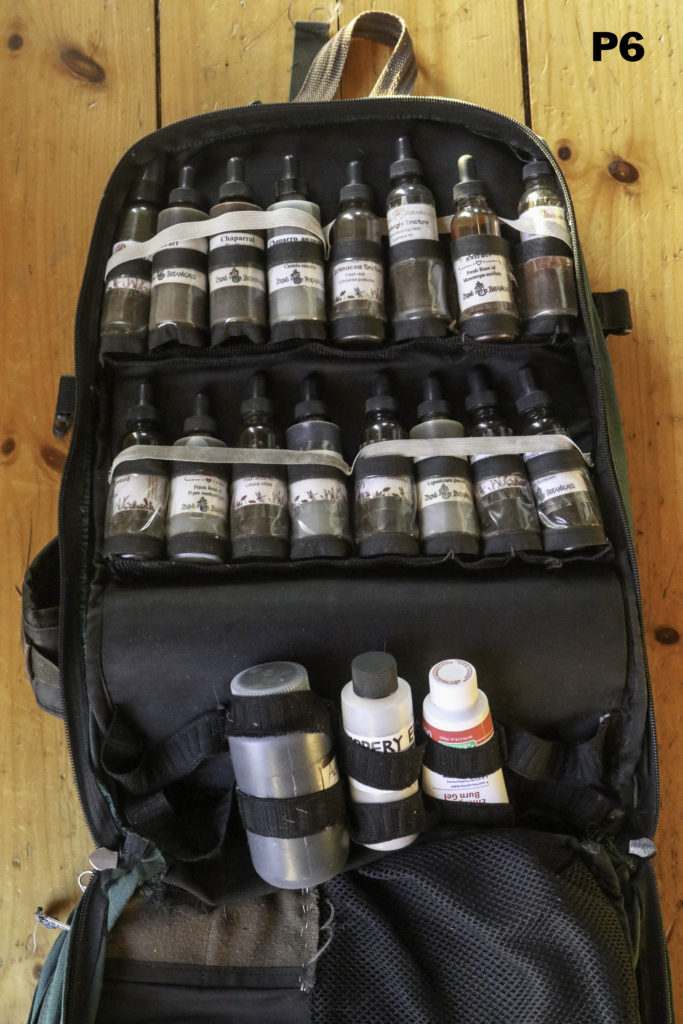
Panel 6
- These bottle holders were set up to hold 2 oz bottles
- The bottom strap held larger bottles
Considerations
- This whole panel needs to be redesigned to hold larger bottles
- The straps on the bottom became loose. These could use some kind of draw cords or other kind of strap to maintain their elasticity.

New Pack-Design, Changes, Improvements
As mentioned above, I am looking to have a new bag designed. I am willing to work with anyone serious about producing this bag. I would be glad to pay a fair price as I realize it will take a lot of time to design and make one.
Bottle Holder Notes
The need for bottle holders is the main difference producing an herbal first aid bag. It is also the most challenging aspect.
It is important to be able that the bottles are held firmly in place, that they are easy to find to be able to put them back quickly so that the bag stays organized.
When I first began considering the design of these first aid bags, I wanted them to be light and to carry a large assortment of herbal medicines. This is why there are so many 1 oz bottle holders. When working at a first aid station, there is usually backstock so small bottles can be refilled as needed. But in other situations, refilling may not be a possibility. And for many herbal medicines, 1 oz does not last very long. In the redesign, it would be helpful to have less 1 oz and more bottle holders for 2 oz and 4 oz bottles as well as slots for some larger bottles.
What has worked
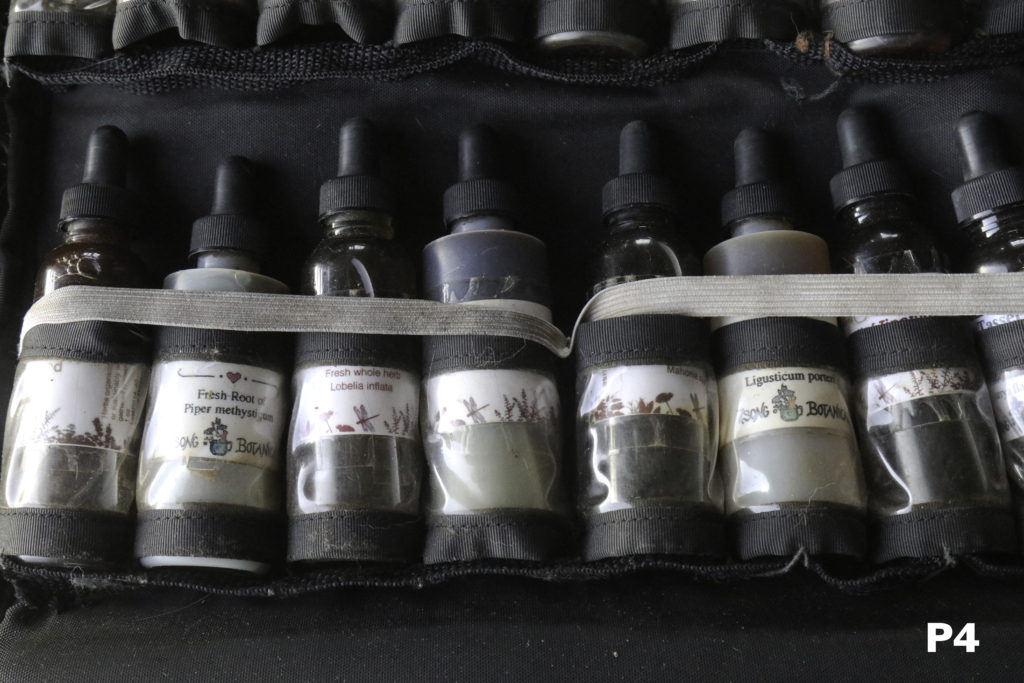
- Individual holders for each tincture bottle
- The clear plastic to see the names of the medicines and hold the bottles in place so the labels can be read and found easily.
What did not work
- The sizes bottles may change, but the design only holds one width.
- The straps holding the bottles in place became loose with time.
- The loosening made it necessary to add new straps along the top and to add bottom row to hold them in place.
Bottle Holder Considerations
- A clear plastic that does not break down but is still transparent and elastic
- Can there be a way to cinch the individual bottles or a row of bottles.
- Potentially a draw string toggle or something similar
- Would this be annoying when taking out and replacing a lot of individual bottles at a time? Would it slow down the process?
- Would it hold up or break down with use?
- A place for larger bottles to be held. Potentially of variable sizes.
- A toggle draw cord might work for these
- Each individual larger bottle may have its own holder and toggle since there will be less of these and their sizes more variable.
- A bottom to hold the tincture bottles in place.
- Approximate number and sizes of bottles
- 1 oz-16
- 2 oz-24
- 4 oz-8
- 8 oz-4
General Considerations
- This bag is carried and jostled a lot, it is important for bottles to be held in place in their pockets and sleeves
- Monprene droppers can be used in place of rubber droppers as they do not degrade like rubber.
- Can the bag be both backpack style, but also have a shoulder strap (see below).
- How the weight is distributed in the bag is important, with heavier items in panels closer to the carriers back.
- A backboard to keep the bag firm against the back.
Zippers, Straps, Compression and Handling
- Zippers
- These need to be a good quality and durable.
- Cords attached for easier pulling.
- Compression straps
- Two on each side of the bag
- Quality straps for shoulders and waist
- Handling
- Two possible styles for handling
- Backpack style, as it is now
- Shoulder bag style. I often am carrying two bags with me, and this would allow me to carry the first aid bag as a shoulder bag while also wearing a backpack style bag.
- Could the backpack style straps be reformed to make it a side/shoulder bag?
Pockets
- It is important that the pockets can be tightly closed as the bag is often opened fast and things can fly out of the pockets.
- An extra pocket on the outside for items used often such as gloves, mask and checklist.
- Small secure slots/pockets for tweezers, scissors, etc.
- A place in the front for an identification card
- On the pockets, thinner material so it is more lightweight. But the material must provide some cushioning.
- A piece of clear plastic/label holder over each pocket where they could be labeled for what they contain. For instance, ‘Gloves’.
- Have about 7 pockets on the inside.
- There could be smaller pockets within larger ones to hold smaller items
- A few inside mesh pockets to be able to see what is inside them. These would need zippers or other secure closures.
- More outside pockets of varying sizes for the equipment commonly needed.
Questions
- What is the estimate of what a new bag will cost?
- Will you be producing these for sale?
- Would you consider making smaller first aid bags?
- Will you share the design?
